As part of my developing interest and understanding of light, I have
recently been on a two day studio portrait photography workshop booked through
the Royal Photographic Society and tutored by Chris Burfoot. I have mentioned in a number of posts before
that the Light module was the first
time that I have really made any great effort to take photographs inside and
get a grip of the lighting requirements to do so effectively, so this seemed an
ideal opportunity to get some tuition in the area of portraiture and also to
try out some top end professional kit instead of my pieces of silver foil,
cardboard reflectors and tracing paper…..
The kit used throughout was Broncolor
flash, which is as good as it gets, Lastolite
reflectors, and a Hasselblad camera
was available to borrow to see just what image quality can really look like (I thought
my 5DMkII was good, but the H40D produces images from another world).
The course is based on flash and the pro studio units generate lighting
like the surface of the sun compared to my two constant lights or Canon Speedlites. The two days were so good because they generally
covered the same aspects of lighting as are in the OCA light module and there
was some commonality in approach as form, shape, colour and texture were
emphasised throughout. We started off
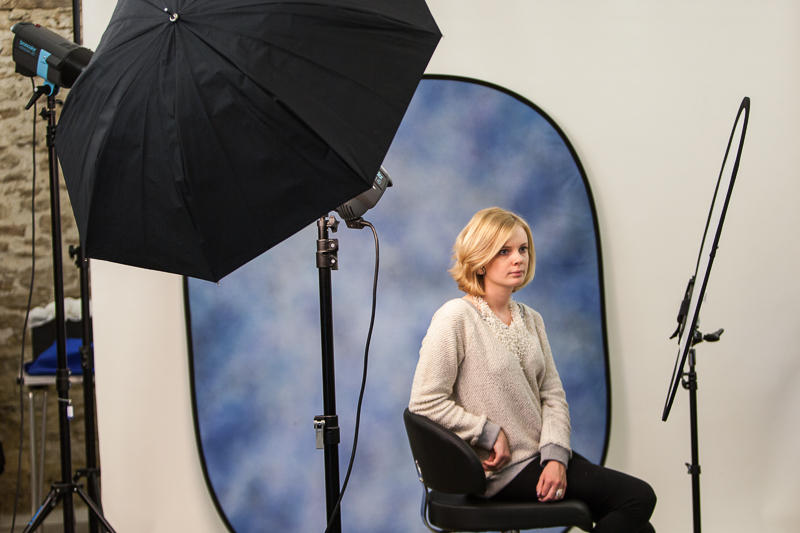
with a simple single light setup, then introduced a reflector, then two lights,
hair lights etc. and covered the lighting options as listed below. We also worked with coloured, black and white
backgrounds.
Cameras were used exclusively in manual mode and exposures set by use of
flashmeter readings and adjusted with the controls on the flash heads, and of
course I have to mention the endless patience of the model who smiled and posed
for hours over the weekend. One of the
most valuable lessons for me was in the placement of reflectors and I was
surprised how close these actually were to the model. Given the massive light output of the flashes
the reflector panels were often only 30cm or so from the model’s face, and that
surprised me, but the panels are huge and made for a wonderful large source and
therefore soft lighting, ideal for portraiture.
 |
| Front light + reflector + hair light with snoot + blue background |
 |
| Taken with the above set up |
 |
| Front lighting + reflector just under the hand |
 |
| Front light high and pointing right down + triple reflector just below frame. You can see the multiple catchlights in the eyes |
There was a lot of other information discussed around the business of
portrait photography and I picked up some websites to see how the pros do
it. So if you want to hire a fully
serviced studio big enough to photograph a double decker bus have a look at BigSky London, and to see some amazing top end work that’s a bit different, try
Ben McDade and Tim Flach.
- Flash
or Continuous light - advantages and disadvantages.
- How
a studio flash works.
- Setting
up a portrait with a single light.
- Changing
the quality of the light with simple accessories.
- Placing
the main light. Using a simple reflector.
- Using
a flash meter and setting your camera.
- Adding
a second light.
- Light
control accessories.
- Hair/background
lights.
- Getting
more depth into your portraits.
- Using
a main and fill light.
- Balancing
light sources with a flashmeter.
- Lighting
a white background - not lighting a black one!
- Softboxes
- stunning portraits with a small softbox.
- Positioning
lights and subjects.
- The
inverse square law
- Using
larger softboxes to create lovely soft lighting.
- Hard,
high contrast lighting. Mixing hard and soft light together.
- Lighting
for full length. The white background, for children and contemporary
portraiture.
- Camera
viewpoint.
- Using
a lightbank as a huge soft light.


Wow - what a couple of days Are the images here ones from the Hassleblad?
ReplyDelete