The final
exercise in Light looks at the perils
of photographing shiny surfaces and dealing with reflections. The set up required was a basic one with the
camera aiming directly downwards at a flat and shiny object, in my case a cake
slice, set on a black background. I used
one of my constant lights set as lose to the camera as possible to illuminate
the metal surface; I used the light rather than flash as it was far easier to
be able to see the reflections in the metal in real time rather than the trial
and error of the flash approach.
The first
series was taken with the setup as shown below (the light was moved around) and it produced a clear reflection
of the camera and the tripod leg with its green covering.
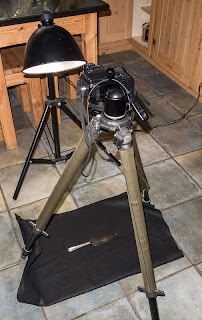 |
| Initial setup |
 |
| Light by camera. No diffusion |
I then moved
the light to be opposite the camera and facing it one metre away; the light was
angled down at the metal by about 45 degrees and I expected this to generate a
lot of reflection as the camera was within the family of angles where this
would be anticipated. As expected, this
made things worse and gave a clearer reflection of the both the camera and the
tripod leg. My next shot had the light
held at ground level with a very low angle of illumination which again produced
a lot of direct reflection although it did light the side of the handle rather
more.
 |
| Light opposite camera. No diffusion |
 |
| Light at floor level. No diffusion |
I now
introduced a cone made from heavy grade tracing paper and which went snugly
around the lens and reached the floor to envelope the cake slice as shown
below. The objective was to diffuse incident
light and cut off or reduce reflection in the metal, although it was always
going to be possible to see the reflection of the lens, as it was directly
above the reflective surface. The light
for the first shot was right next to the camera, looking directly downwards at
the metal.
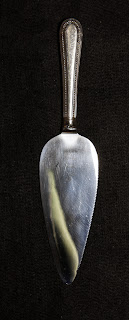
The tracing
paper had a significant effect on the image and the reflection of the tripod
leg was completely eliminated, although the reflection of the front of the lens
could still be seen. The reflective
surface of the shiny metal took on a new quality with the tracing paper cone in
place and this was the first image where the engraving in the metal could be
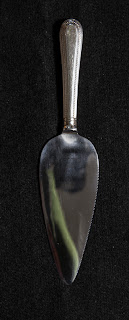
seen. The next two shots had the light
in front and pointing down at 45 degrees and at ground level as was done from
the photos taken in the absence of the cone.
This caused little change although all were far more acceptable than
their equivalents in un-diffused light.
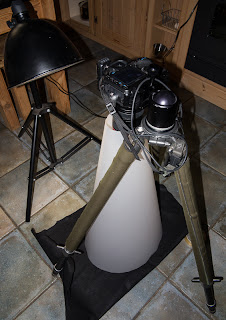 |
| Setup with paper cone |
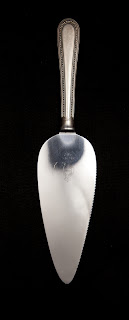 |
| Light by camera. Cone in place |
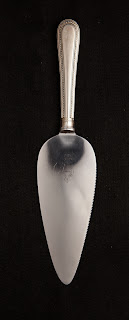 |
| Light opposite camera. Cone in place |
 |
| Light at floor level. Cone in place |
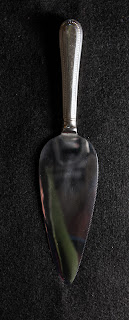
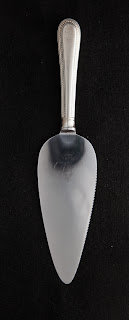
Finally, I
took one shot to try and light the cake slice favourably. I had the camera looking down at an angle of
about 50 degrees and the light at right angles to the metal and to the right;
with this arrangement the camera was outside the family of angles likely to
cause reflection. The outcome was better
than those taken following the exercise, and although not great as I didn’t
spend a great deal of time on this, showed the potential for getting the right relationship
between the subject, lights and camera.
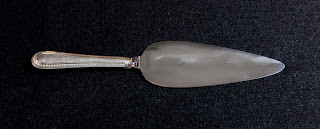 |
| No reflections (almost ..) |
I am still
intrigued by the infinite possibilities of lighting and am determined to do
more on this outside of the course requirements. Hopefully I will be able to put the learning
into practice in taking the assignment images as I felt that I was starting to
get a rudimentary grip of what was going on as I went through the exercises.


No comments:
Post a Comment