This one is
all about getting light to be concentrated on just a part of a scene which can
be achieved with various devices designed to either focus the beam from a flash
or constant light or physically block incident light from reaching the subject and
stop it flooding a whole area. To
restrict to spread of light the options include a snoot (effectively a long
tube to direct the beam) and grid (a ‘mesh’ of square or circular cells in a
holder which fits over the front of the light or flash). Both these are dealt with in the excellent Strobist Blog and their use thoroughly described in Harper et al (2012) which has a really good selection of lighting diagrams
to set up various situations.
My available
light sources were either a pair of 300w equivalent daylight balanced
fluorescent constant lights (although the dishes are rather small) and Canon
580EX MkII and 430EX Speedlites. Light
modifiers were handmade and included a grid (3cm depth) and a snoot (20cm) plus
a range of reflectors and a black card to act as a gobo (“go between”) to block
certain light angles. The grid and snoot
were made following the instructions in this link as the measurements are
specific to the Canon 580EX and saved me trying to do it by trial and error to
see exactly what fitted. Flashes were
triggered with a pair of Phottix Strato
II Multi radio triggers which I normally use for remotely triggering a
camera in wildlife applications, and the camera was the Canon 5D MkII with the
Canon 24-105mm f/4 L IS lens set at 40mm.
Aperture was f/16. Flash was set
to manual and 1/8 power.
 |
| flash and grid |
 |
| flash with grid attached |
 |
| flash with snoot attached |
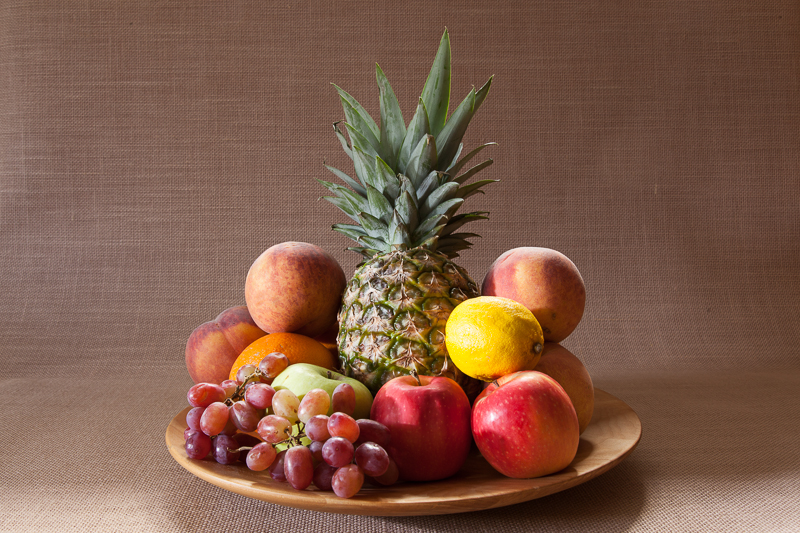
The subject I
chose was a still life of a bowl if fruit and I set about trying to highlight
the body of the pineapple with my collection of high tech and handmade
kit. The subject was set at camera
height with a hessian backdrop arranged as an ‘infinity curve’ and the arrangement,
with gobo in place, is shown below.
 |
| flash, grid, gobo and camera setup |
The first
image was taken with just an unmodified flash with the light set at subject
height and at 45 degrees to the right and fully illuminated the whole of the
fruit bowl. The second shot had the grid
attached to the flash which produced more a directional light and started to
illuminate the centre of the fruit bowl and also reduced the light spilling
onto the backdrop.
 |
| - grid - gobo |
 |
| + grid - gobo |
The third
shot was taken with the grid in place, and this time I added a black card gobo
which further reduced the light falling on the bottom of the image and
accentuated the pineapple some more.
 |
| + grid + gobo |
For completeness I did the last of the combinations which was to have
the gobo in place, but with the grid removed.
This reduced lighting to the bottom of the frame, but lit the whole of
the top of the arrangement and the background.
As my objective was to focus attention on the pineapple, my favourite
shot was the one taken with both the grid and the gobo in place.
 |
| - grid + gobo |
Finally, I
took the gridded light much closer to the subject, and took an image with the
gobo in place to try and really maximise the ‘spotlight’ effect; this I thought
was very successful because of the both the closeness of the light but also
because the light spilling onto the backdrop was very small.
 |
| grid spotlight |
I took a
second series of images using the snoot, this time with the light set at the
side and at 90 degrees to the camera.
The first shot was again with the naked flash to set the scene. The second was with the snoot in place and
aimed at the pineapple, the third with the snoot and gobo in place, and finally
the set was completed with the gobo in place with no snoot.
 |
| side light - snoot - gobo |
 |
| side light + snoot - gobo |
 |
| side light +snoot + gobo |
 |
| side light - snoot + gobo |
Finally, I
finished up with a snooted ‘spotlight’ shot after moving the flash closer; the
effect was very similar to when this was done with the grid although the
spotlighting effect was a little stronger.
 |
| snoot spotlight |
While I was
doing this I wondered how easy it might be to create an effect that looked like
sunlight just catching the arrangement, so I set the gridded flash much lower
and placed the gobo above it to try and restrict the throw of the light to a ‘beam’. I was quite pleased with the outcome.
 |
| sunbeam ! |
I think I learnt
more from this exercise than I have from any other so far. The importance of the distance of the light
from the subject and whether it is therefore a large or small light source in
relation to that subject is critical. The
relative ease with which the light can be modified to achieve certain effects surprised
me – although I was only doing something very basic with single lights, I was
still surprised at how many ‘different’ images could be conjured up from the
same set and how much control it was possible to have. Oh yes, and Hunter et al (2012) is an essential accompanying text – it has all the
answers on how to do the lighting exercises and very clear and uncomplicated
descriptions.


No comments:
Post a Comment