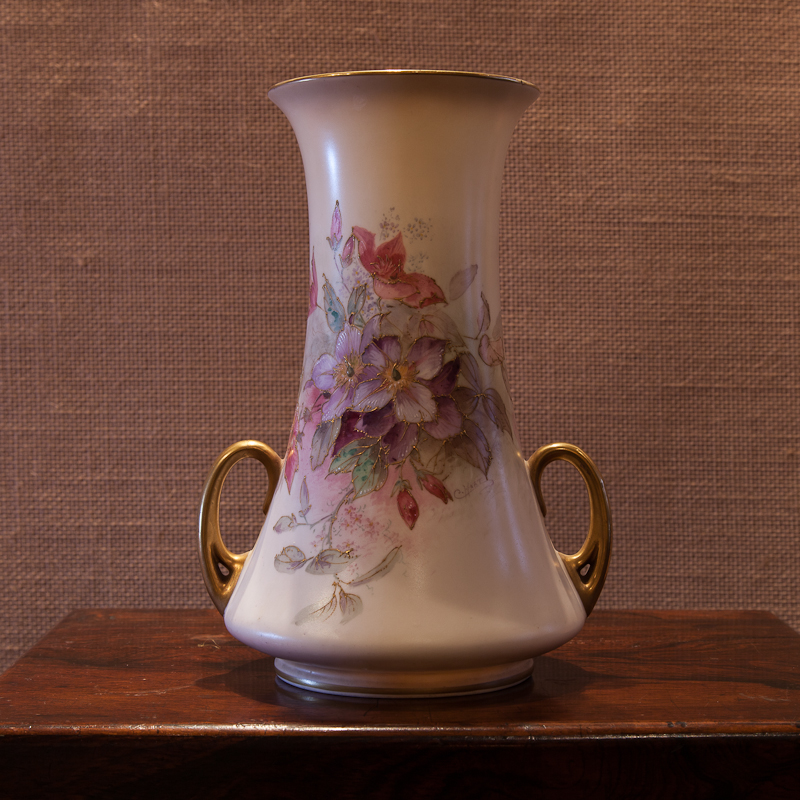
Following on
from the previous exercise on lighting angle, this time I will be considering
contrast and shadow fill. I used a vase
as the subject for this shoot and the camera was straight in front, with the
light, in this case I chose to use flash, set at ninety degrees to the side and
about five feet away from the subject. After
a number of test shots, the flash was set on manual with the zoom at 24mm to
spread the light and the intensity set on 1/8 power.
Baseline shots
were taken with the naked flash and then with the packing stiffener diffuser in
front of it. After that, a sequence of
shots was taken with a large white card opposite the light held at 3 and 1.5
feet from the subject and then with some aluminium foil as the reflector to
fill the shadows; the foil was tested with both the shiny and dull sides towards
the light and was then crinkled by hand, flattened and used as the reflector with
the shiny side towards the vase. A silver sheet would be expected to reflect more light onto the subject
than a white one most of the time, but it worth remembering that a silver card
produces direct reflections and has its own restricted family of angles from
which reflection can occur. The
reflections from a white card are diffuse and therefore the precise angle in
relation to the subject is less critical than for the directly reflecting
silver card.
The initial
shot with the naked flash threw the side of the vase away from the light into
shadow and brightly lit the flashed side.
The diffuser placed over the flash spread the light into a greater
source area and gave more of a ‘wrap around’ effect, lighting the side away
from the flash more than was apparent from the non-diffused light source.
 |
| Flash - no diffuser, no reflector |
 |
| Flash - with diffuser, no reflector |
The white card
held opposite the flash at a distance of three feet from the vase introduced
more light into the shaded half of the vase and details in the shadow area
started to become apparent. When the distance
between the subject and reflector card was halved the amount of light thrown
onto the shaded side increased by four fold (inverse square law) and the light
became almost uniform around the vase whilst still retaining some modelling and
detail.
 |
| Flash - no diffuser, white reflector at 3 feet |
 |
| Flash - no diffuser, white reflector at 18 inches |
The three
shots with the aluminium foil were in many ways the most interesting. The dull surface gave quite an even lighting and softened the details of
the vase, whereas the shiny side of the foil generated a really harsh light
with the reflector appearing to reflect the light source back in to the surface
of the pot. The details in the pattern
on the vase were quite sharply modelled but the image was spoiled by the
reflection from the foil itself.
When the foil was crinkled and the shiny side presented as a reflector the
shadow fill was much softer than was seen with the flat shiny foil, and the
although the reflection of the reflector could be seen, it was quite a pleasing
effect to just have the soft hint of a reflection on the vase.
 |
| Flash - no diffuser, dull foil reflector |
 |
| Flash - no diffuser, shiny foil reflector |
 |
| Flash - no diffuser, crinkled foil reflector |
The second sequence
of images was photographed in the same order except that they were taken with the
diffuser in place in front of the flash. This reduced the light levels but also clearly
softened the reflection due to the diffusion and spreading of the light from an
effectively larger source. The dull side
of the foil gave a similar effect to that which it achieved in the absence of
the diffuser, with a soft and even light and reasonable modelling of the details. The shiny foil reflector again gave the
harsher detail and the reflection of the reflector was again apparent. The crinkled foil gave a pleasing effect with
good modelling of the detail and good overall level of contrast.
 |
| Flash - plus diffuser, white reflector at 3 feet |
 |
| Flash - plus diffuser, white reflector at 18 inches |
 |
| Flash - plus diffuser, dull foil reflector |
 |
| Flash - plus diffuser, shiny foil reflector |
 |
| Flash - plus diffuser, crinkled foil reflector |
I took a
final couple of shots with a sheet of black velvet held at three feet or one
foot from the vase on the opposite side to the flash to establish what happened
when reflected light was significantly reduced.
With the velvet at three feet away from the side of the vase the side
away from the light fell significantly back into shadow and the relief of the
detail was reduced, but with the velvet held at only one foot from the vase,
the light was reduced to=o such a level that the entire image became dull and
lifeless, although it is certainly a valid technique if the desire was to have
one very bright side and one very dull side in the photograph.
|
| Flash - plus diffuser, black sheet at 18 inches |
 |
| Flash - plus diffuser, black sheet at 3 feet |
Like all the
lighting exercises so far I think I have got a lot out of this in terms of
understanding the role of contrast and the modelling of detail in an image, and
especially in gaining experience of controlling light via the use of reflectors
of different types. I was impressed with
the quality of the images that came from the crinkled foil as a reflector as it
seemed to me to iron out the worst effects of other approaches whilst
accentuating its own benefits. I have
also seen the value to be gained from using diffusion to increase the apparent
size of a light source, thereby modifying the impact in the incident light on
the subject. I have done very little
indoor lighting and still life photography and this has given me some ideas as
to how I can handle parts of the assignment which will form the final
assessment of this unit.