Showing posts with label ASSIGNMENT 4 Applying lighting techniques. Show all posts

Sunday, 2 December 2012

ASSIGNMENT 4 : Tutor feedback and response

Feedback on the Light assignment has been received and I am very pleased with the response.  The summary comments were ….  “The volume of work for my assessment is evidence of your application and it is considerable, but the logical layout makes my task much easier.   The ground you have covered in this assignment and in your exercises may be a new experience for you but it will prove a great benefit in your future work and a solid base on which to build.   I am impressed by the array of lighting equipment which you employed on this assignment and the experience you gained on the RPS workshop.   I don’t think there is any other way to become acquainted with studio lighting than ‘hands on’.   It seems that Chris Burfoot gave you some good grounding in the basic techniques.    I don’t know if you have flash meter yet but I would certainly recommend the purchase because I could not possibly manage without one.   I have found your ability to articulate your work lucid and extremely interesting which has made my task enjoyable.   You images are sharp, well framed and clearly presented.”  I am going to need to reshoot a couple of the images and in view of the conditions outside, will probably have to drop the ambition to have one natural light shot for each example, but there was no instruction in the brief to do that, so nothing will be lost there.

 
There were some specific comments on individual images and these are dealt with below.

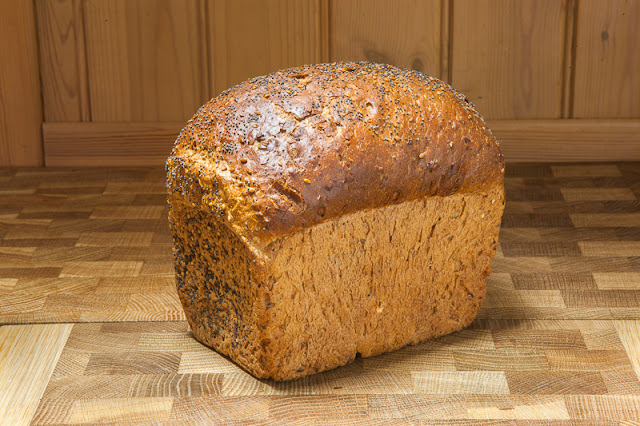
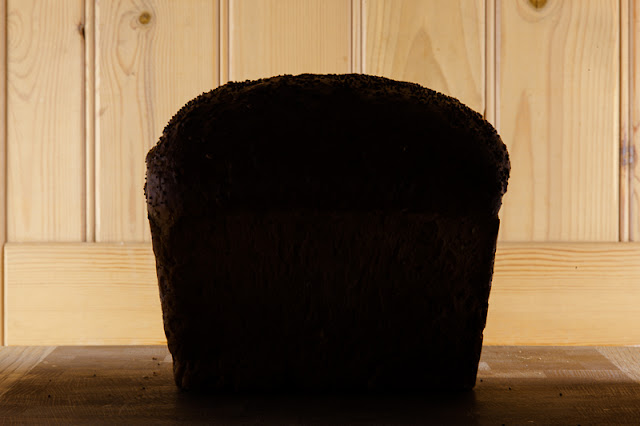
For ‘Shape’ the feeling was that “This image certainly succeeds in demonstrating your subject’s basic shape but I feel that there is a too pronounced fall off in the illumination of the background probably because the light source was a little too close to the background.”  Having looked at this again, this is absolutely right and I have repeated this shot with one of the large lights behind the loaf, but this time allowing less of a gradient in light between the subject and the background and the following image is now the one I will submit in February for assessment.


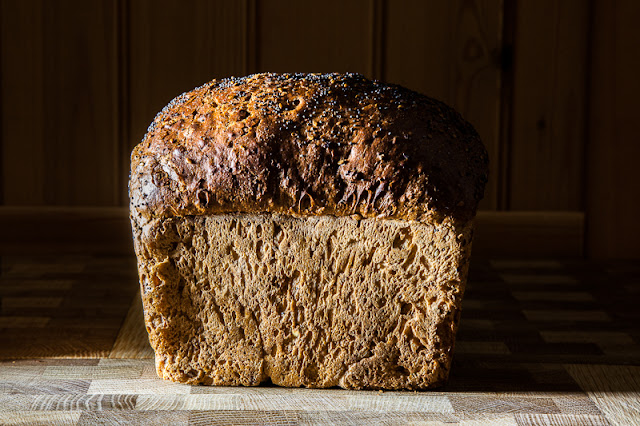
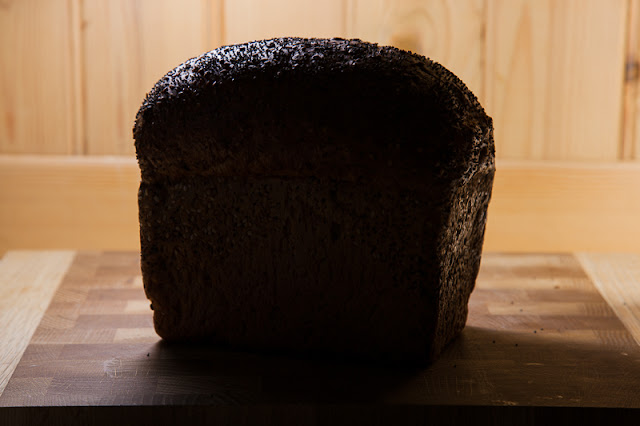
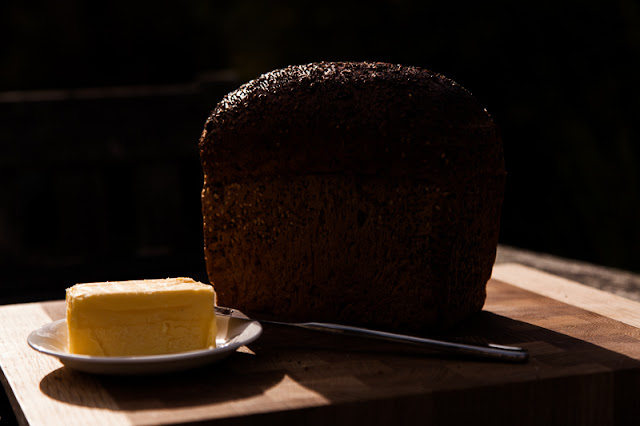
The second Shape image was the one taken outside under natural light and either needs replacing or reshooting.  The view was that “the loaf is so heavy that it merges with the background and I am sure that you will be able to relieve it before you send your work for assessment at the end of the course.   It is only a minor point but as you have used two side elevations could you perhaps make one image of the end elevation?”  I had a lot of trouble with this one in that I was happy with the original image on screen, but the definition of the edge of the subject seemed to be affected by compression for web viewing, so I will need to reshoot the image or rework the existing file.  It was also a good suggestion to use an end-on aspect for this as I had indeed used other angles and needed to get away from the trap of being repetitive with such simply shaped subject, so if I reshoot this I will certainly do so with the end-on elevation.  This nagged at me for some while and I eventually decided to take more images as I was not sufficiently happy with the originals to make me want to spend time in CS5 making adjustments.  I also liked the idea of using the end elevation to show some variety, and although the weather prevented me from making this an outdoor shot as I originally intended, this was another reason to re-shoot.  I set up the loaf end on with the two big lights behind at 45 degrees and positioned to give a rim light effect.  This time I used a black background to be different to the wood I used previously and flagged the lights with black card to prevent light from spilling onto the background and illuminating the backdrop.  Camera position was level with the loaf and I underexposed by 2 stops to ensure that the rime lighting effect was maximised.  The result is below.


In Form the view was that all three images I had considered were good but that my tutor’s selection differed from mine.  He felt that my choice of the loaf cut in half may be considered by the assessors to be changing the basic shape of the subject and therefore outside the guide set by the brief.  I’m not going to argue with that so the half loaf goes out and will be replaced by the image where the loaf is stood on it end, having now made the adjustment suggested to take care of “the flat area on which the loaf is standing … is slightly weaker than the first (image) and you might like to lower the brightness a little.” Job done.


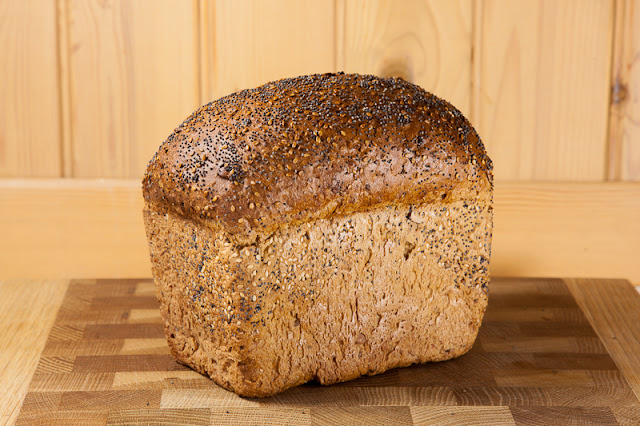
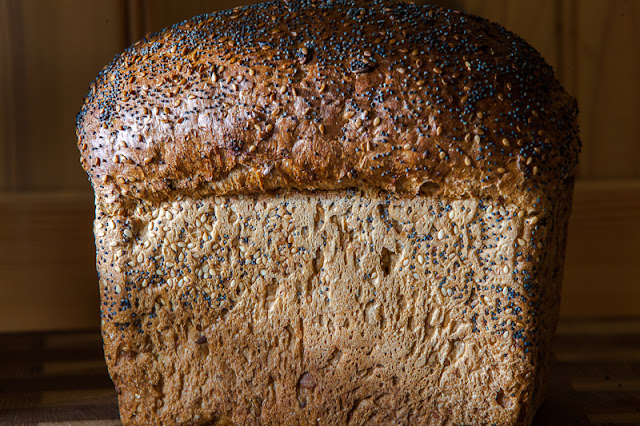
Texture generally worked well and there was agreement with my selections (which were actually the images I had put in my final selection on flickr) and that the rather tightly framed side elevation should be rejected in favour of the highly detailed close up.  It was also suggested that I might have considered using the highly structured top of the loaf as the subject for one shot rather than doing both from the side; this is a good suggestion and as I intend to re-shoot one of the Shape shots, I will have a look at the possibilities around this before final submission for assessment (and the folks in Sainsbury’s can give me strange looks again as I pick through the seedy browns for the fourth time to select just the right one !!!!).  

Another day, another loaf.  Yes, more strange looks and the perfect loaf was selected and photographed.  I did this outside to take advantage of the intensely bright day after a sharp overnight frost and set up with the camera looking directly downwards at the top of the loaf while the low sun raked across the surface from the left; I used a small silver reflector to ensure I picked out the detail and texture on the right hand end of the loaf as well.


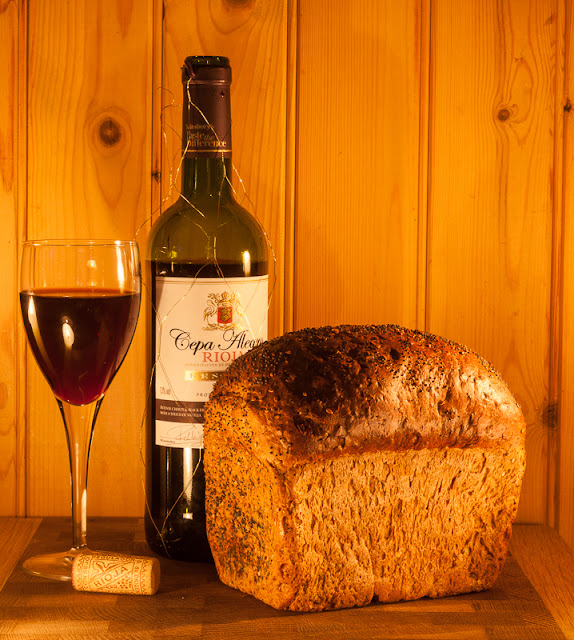
Colour was well received and the views were … “I applaud your time exposure shot taken by the illumination of six candles.  In my opinion, you have achieved an excellent effect which contrasts sharply with your second image to demonstrate the difference between daylight and an artificial source of candle light.  Because of the candle flames tendency to slight movement, your long exposure has slightly softened the edge of the shadows which is a tiny detail that enhances your image.   You have created the warm glow you will feel after finishing the bottle of Rioja!  This shot also demonstrates the colour of your subject in contrast with the green in the background.    This, the last of the images in this assignment is final proof of the appropriate character of your choice of subject.”

 I am extremely pleased with the above, and especially that the areas I thought showed weakness were the ones that were pulled out, which hopefully means that I am getting to be a better judge, at least of my own material anyway.  I also recognise that I need to think more broadly within the brief, and although I had started to move the subject around more in the latter shots I should have considered the potential for selection of elevation and shooting angle from earlier on.  I took a lot of images in this assignment and looking at them in sequence of shooting I can see the development as I went along, although it is hard to show this in assessment format as I skipped around a lot as ideas for each theme developed.

I am pleased that the blog is apparently easy to navigate and follow, and although there are several things I would not do if I was starting again from scratch, I will refine the structure and some aspects of the format when I start DPP in January with a new blog.

Thursday, 22 November 2012

ASSIGNMENT 4 Applying lighting techniques

I have spent a number of sessions playing with lights and loaves and experimenting with flash, grids, snoots, gobos, flags, small and large constant lights, candle light and natural light outside as well as various reflectors and diffusers.  I have had a great time exploring this as it is not an area of photography where I have any previous significant experience and the learning curve has been steep and profitable.  In the end I felt quite comfortable that I could set up lights and modifiers to get the effects I wanted, especially using the constant lights, and it soon became clear that the larger lights were a far better option, and with 1300 watts burning away, things were just that much easier to set up.  I thought the loaf was ultimately a good choice as it had such pronounced shape and texture with it block shape and fine irregularities on the surface.  I also tried as I went along to add a few more aspects to the shots, so introduced some simple props that I thought fitted the situation, like the wine in the candlelit shot and the knife in the shot where I eventually chopped the loaf in half (it was almost fossilised by then).

Shape
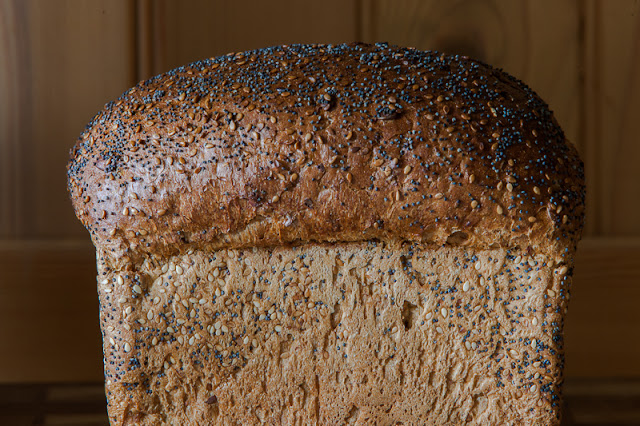
The technical details of these images are described in a previous log post, so this is all about the selected images I intend to put forward for assessment.  The first ‘shape’ shot was taken indoors and the lighting was set up such that he loaf was almost in silhouette and the background was well lit to provide a contrast with the darkness of the bread.  I felt that this worked very well as only the outline of the loaf was clearly defined, yet the identity of the subject was clear.  The second shot for ‘shape’ was taken outdoors and I wanted to try and use a rim light effect in this case such that I could show the dark loaf against a dark background – obviously only possible if the edges were picked out by the light.  A low sun and some precise deployment of gobos and flags got the effect I was after, very much aided by the shiny and baked top of the loaf catching the rays of the sun.


Shape (artificial light)
Shape (natural light)

Form
Form’ is all about the volume or 3D aspect of a subject and I felt needed a higher camera angle and a single light left and level, with a reflector deployed front and right to add different degrees of fill until I felt I had achieved the effect I was after without knocking out the shadow detail under the loaf.  I shot an alternative to this as I thought the loaf stood on its end might be better to demonstrate the 3D effect I was after.  This was again lit from the side and left with the reflector front and right used to adjust the shadow so it was not too dark, but without taking out the shadow that created the effect of volume.  Although both do the job, I think the upright shot of the loaf is better as it uses three of the flat sides and accentuated the 3D effect.

The last shot for ‘form’ took a different approach and in this instance I cut the loaf in half and used a reflector to put light onto the left hand half and used the reflection from the knife to just lift the shadow on the right hand half (I was surprised this worked as well as it did, but the knife does have quite a large silver and shiny surface area.
Rejected :  Form (artificial light)
Selected :  Form (artificial light)
Form (natural light)
Texture
 
I agonised over the selection of the final image here for some considerable time.  I decided early on that the shot with the flash and the snoot plus flag that I took with the 70-200mm lens at a focal length of 200mm was the one I wanted to go with, but what sort of crop was most appropriate?  Given that I wanted to accentuate detail in the image I eventually decided to go with the crop that showed the most detailed part of the photograph where the small and hard shadows were at their most acute and there was no distraction of background or surroundings.  I chose the second shot from the outdoor series where I had set up a series of gobos and flags to restrict access of light to the loaf in quite an extreme manner, with just a slice of the low and harsh sunlight raking across the face of the loaf.  Given the cloudless sky, the sun represented a small and hard light source and the angle the bread was presented to the light really pulled out the sharp detail on the top and front.

Rejected :  Texture (artificial light)
Selected :  Texture (artificial light)
Texture (natural light)

Colour
I wanted to do this without recourse to Photoshop, so chose to go with the photographs taken indoors in candle light and outdoors in the sun.  The candle light shot was lit entirely with six candles and required an exposure of 90 seconds, but it did deliver a richly coloured image which brought out the warmth in the scene. The outdoor shot was taken quite early in the day when there is more orange in the light and again the choice of light source and direction brought colour and warmth to the loaf.

Colour (artificial light)
Colour (natural light)
So, that’s the end of Light and Assessment 4, at least until I get tutor feedback anyway.  I learnt more from this unit and building towards the assessment images than I did from any other part of the course so far.  I had done very little indoor work at all until this point and the topics explored were new to me as I explained in the introduction to this piece.  Some things were frustrating, especially the demonstration of form, which I originally felt should have been the easiest to demonstrate.  With the loaf as the subject of the assessment, it had such an obvious 3D structure that regardless of how it was shot I always felt it showed ‘form’ whenever it was photographed in full light.

Texture’ and ‘Shape’ were the most satisfying elements for me as it was possible to create such massive changes in the way the subject was lit with relatively small and subtle changes in the positions and angles of the various light modifiers.  I got a lot out of this and it is certainly an aspect of lighting that I plan to use more in my other photography rather than just being satisfied by subjects that were ‘nicely’ lit.  Light, Science and Magic was a great companion text to Light, as was Syl Arena’s Speedliter’s Handbook, both for the lighting setup diagrams and for the Canon specific guidance when using flash.  Other sources worthy of note are the Strobist blog and the lightingmods blog as well.

I have written a separate post about this, but I attended a two day Royal Photographic Society workshop on studio lighting which was tutored by Chris Burfoot.  This was an outstanding couple of days and all the concepts that I have working on during the Light module were covered, but with respect to studio photography.  Oh how wonderful it would be to have the huge Broncolor studio flashes and a Hasselblad medium format camera to use like we did on the course ….  rather over the top for a loaf of bread I guess …

Sunday, 4 November 2012

Assignment 4 : Light : of lights and loaves ...

Having given further thought to the possible options for this assignment and reviewed the subjects I used for the exercises, the garden gnome, the loaf and the statue, I have concluded that the best option with which to progress is the loaf.  A mission to the supermarket allowed me to look at a startling array of loaves of many sizes, colours and textures, and without looking too much like a bread stalker while I was checking out the produce, I selected a moderately sized brown job with a nice seedy texture and rich colours ..  !!  Still got some strange looks though .. 

The following post charts my progress through this assignment so far and looks at the options I selected, the lighting arrangements I used and the photographs I took along the way as possible contenders for final submission.  At the time of writing I have not finally decided on which images I will put forward for assessment, and I still need to complete two more of the required elements of the assignment, but I wanted to record where I have got to at this stage.

I started the project with a pair of small constant lights, each with a 30 watt fluorescent bulb suitable for shots for small scale product photography, and a pair of Canon Speedlite flashes.  After a while I got hold of a pair of larger lights, each with 6 fluorescent bulbs outputting a total of 1300 watts when both lights were operating with all bulbs lit.  These gave the options of either using a 40cm silver ‘lampshade’ reflector or adding an 80cm softbox.

For my first shots using the small lights, I set up the loaf in front of a suitable wooden background and on a bread board as I decided that for the indoor shots I wanted to go for some nice warm tones as this suited the subject.  The first shot I attempted was Form, where I needed to show the volume of the loaf and light it to show its 3D nature as well as possible.  I set the lights up either side of the camera and at about 45 degrees to the loaf.  The lights were about 40cm higher than the loaf and 1m away as shown in the image, and both had basic diffusers attached.
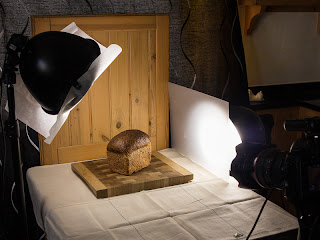
Small light set up

Form 1

The elevation of the light ensured that there was a shadow below the loaf to enhance its 3D appearance and the positioning of the two lights on either side coupled with the angle of the loaf showed its depth.  I selected a shooting angle that encompassed the top of the loaf to further add to the impression of its volume.

A subsequent effort saw me using one of the larger lights with the 80cm softbox attached and with the light position high up and slightly to the rear of the loaf as is shown in the picture.  The softbox was angled very slightly towards the camera as this made it easier to get best use the white reflector I planned to use to fill the front of the loaf.  Watching the impact on the lighting of the loaf on the screen, I slowly raised the white reflector which was positioned to the right of the camera and parallel to the front of the loaf until the shadow on the bottom had been opened up, but not so much that the shadow under the edge of the loaf had been affected – this was important as I wanted to retain that shadow to help with the definition of the volume of the loaf.  I also held a black gobo in position to prevent light spill onto the back ground as I wanted to keep this reasonably dark and give the impression of light fall-off to add to the perception of depth – this gobo is not shown in the photograph of the setup as I don’t have three arms ..  This second shot was the one that I selected for the assignment submission as I felt that it gave better definition to the loaf and rendered its volume more clearly.
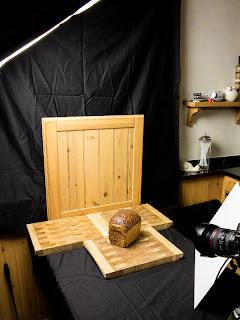
Large set up - single light plus reflector
Form 2
On reviewing these images for Form I think I need to get some more obvious shadow into the images to give a greater sense of depth, so will have a look at moving the lights further away to get a harder shadow and also moving a little further over the back of the loaf with the main light.
My second shot was intended to illustrate the Colour of the loaf and I did this with the lighting setup shown, using both my lights with diffusers attached to generate a soft lighting.  I also underexposed the image by 1 stop to bring out the richness of the colours, although clearly I could have achieved the same effect in post-production if I had wanted to.
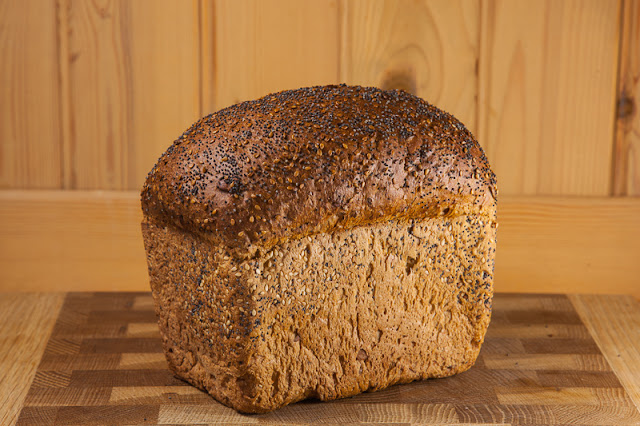
Colour 1 - small lights
I had a second attempt at Colour using the big lights, and set the large softbox right above the loaf as I wanted the soft lighting benefits of as large a light source as possible in relation to the subject.  I set the second light at a slightly greater height than the loaf and pointing directly at the front surface to light that to the same extent as the softbox was doing the top of the loaf from above.  The resultant image gives a smooth and even light distribution and I dropped the exposure by 1EV to bring out the colours in the bread.
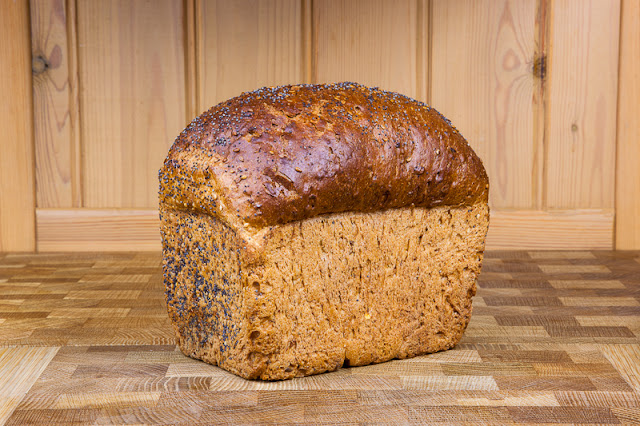
Colour 2 - big lights

I wanted to explore at least one alternative light source and chose to look at candlelight, with a number of candles arranged around the loaf to best expose its shape and colour as shown in the image of the set up.  I also wanted to get away from solely looking at the loaf so decided to add in a couple of small props to make more of a scene that I felt fitted the candlelight theme rather better.  The candlelight introduced a really warm tone to the loaf as would be expected from its light emission spectrum.
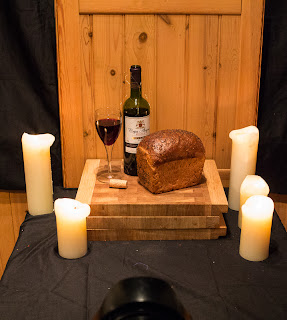
Candle light set up
Candle light - Colour 3

My first attempt at Texture was made with the constant light shining at an oblique angle across the front of the loaf and with a gobo moved around until it had blocked off the light from hitting the top and back of the loaf – I needed to create some small and hard shadows, so shot this with the naked light without the diffuser.  I also swapped over to the Canon 70-200mm f/2.8 L IS lens and shot at 200mm so I could move further away and still zoom in close to the loaf to emphasise details, as the wider angle of the 24-105mm was seeing the light reflected from the gobo and giving flare.  This could have been remedied with a gobo made from non-reflective material and I’ll do this before attempting this type of shot again, although moving to a greater distance with the 200mm zoom did remedy the situation. I felt that this was a successful image and I achieved the sharp surface definition I wanted to show in the texture on the surface of the bread. 
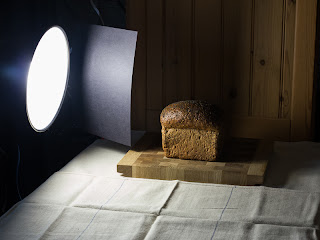
Light and gobo setup for Texture
Texture 1

However, I thought that I might be able to get a better effect if I used a flash with a modifier to direct and restrict the light, so set up the Canon 580 Speedlite with the 20cm black snoot attached and made some test images (again at 200mm)  to get the direction and intensity as I wanted them.  Although the snoot directs the light to a fairly narrow zone, I still found that there was a greater spread than I wanted, so again used a black gobo to keep light spill from illuminating the background or the upper parts of the bread.  The flash was set to manual and adjusted to 1/8 power to optimise the lighting and the image illustrated the texture very well, although I did rather prefer the definition I got from the constant light as the fall off gave a more dramatic lighting that I obtained with the flash.  I’m sure that with further tweaking I would have got more of a directional lighting effect from the flash, and I need to look more at other snoots and grids to try and achieve this.
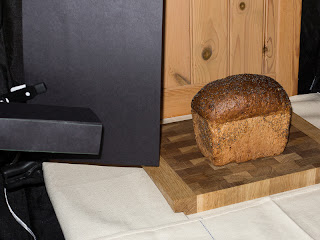
Snoot and gobo setup or Texture
Texture 2

I also used the larger lights for Texture and set up an undiffused 650w light at the same level as the loaf with the light beam raking across the bread to accentuate the texture by creating small and hard shadows.  The light spread in my initial images was too broad so I called upon an able assistant to hold a couple of makeshift gobos to restrict the light to a narrow beam which picked out the details I wanted as shown below.
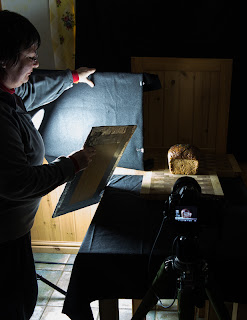
Able assistant with gobos
Texture 3

The texture of the loaf can be seen in even better detail when examined with the camera and lens moved closer and I took one more shot of the side of the loaf, which may well be a contender for submission.
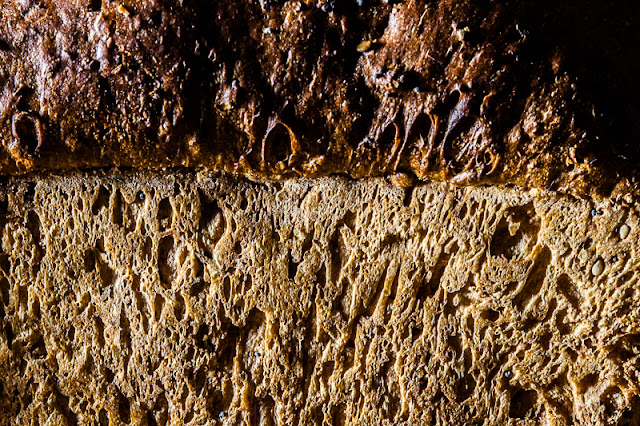
Texture 4

The next shot was aimed at creating a backlit version such that Shape could be seen.  Here it was necessary to light such that the outline of the loaf could be seen, but with minimal detail of the actual bread being visible.  Both the small constant lights were placed behind the loaf and I found that I needed the gobo on the right hand light to prevent spill to the front of the shot.  I underexposed by 1 stop and got the effect that I wanted.  In the original file there is just a little detail in the front of the loaf, which is what I was after, but I suspect that by the time this appears on the blog, this will have been crushed out of existence!  I took a couple of additional shots for Shape, and in both instances chose to have the loaf at a slight angle and positioned the gobo such that a little light was allowed to spill over onto the surface to accentuate the outline.  I’ll need to think about which of these images serves the purpose better.
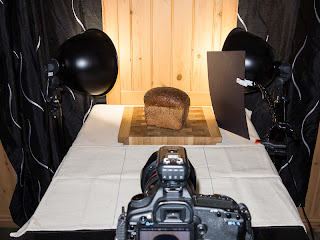
Shape with two small lights
Shape 1
Shape 2

Enthused with the big lights I set this shot for Shape up again with the un-diffused light set above and behind the loaf and aiming slightly forwards as can be seen from the shadow.  I wanted to keep the direct light off the background so used a gobo again to tone this down whilst still allowing an attractive contrast between subject and background.  This shot, at least to me, gave a more pleasing definition of the shape and this will be the image put forward for assessment.
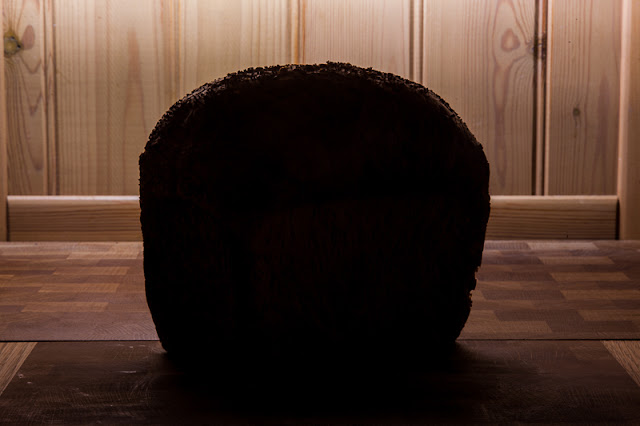
Shape 3 - big lights

My intention was to take some of the eight required images outside using natural light.  The first of these was taken on a day with a lot of high cumulus cloud providing excellent soft and diffuse light which was perfect for producing a shot to highlight the Colour of the loaf.  This image has not been manipulated post-production and illustrates the beauty of natural light in bringing out the best in a subject.
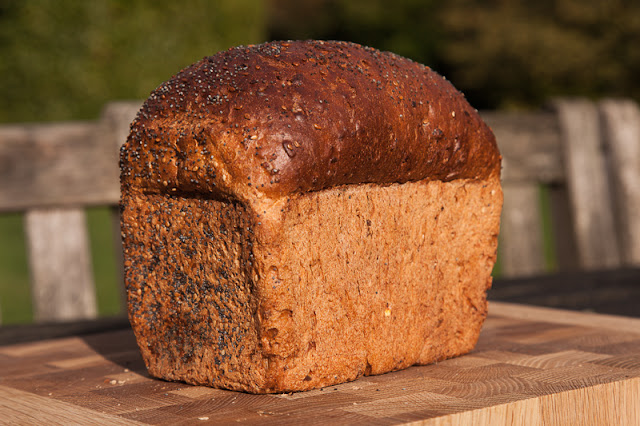
Colour 4 - outside

The day provided a range of different lighting opportunities as the clouds passed across the sun and I took advantage of a sunny spell in the late afternoon to use the low and bright sun to produce a natural light image for Shape.  It was getting close to tea time, so I took a knife and some butter with me ..  Shapes are best defined when they are contrasted with the background as I did for the indoor shot, but in this case I tried to set it up such that I could show the shape of the dark loaf against a dark background by taking advantage of a rim lighting opportunity with the sun behind.
Shape 4 - outside

Light is a challenging assignment for several reasons.  Firstly, indoor lighting is not an area of photography that I have explored very much in the past so I was starting pretty much from scratch, although once I had fabricated some basic light modifiers to add to my two constant lights and couple of flashes and done some experimentation, I was pleasantly surprised how relatively easy it was to get close to the lighting I had in mind.  I shot tethered to a laptop for most of the time and was able to adjust the lights to get the effect I was after as I went along and before each shot.  I found the constant light far easier to use than the flashes as the changes in lighting could be observed in real time; although the flashes do have modelling lights it is not that easy to use them to judge what became some quite tight angles, especially when shooting texture and form.  

My second challenge was around the selection of subject material and I was never really sure that the loaf was the right choice even though it was a good candidate for form, texture, shape and colour and was indeed my tutor’s suggestion.  I had always assumed I would do this with something more original and colourful, but then faced with obviously unlimited choice, I failed to make one, so went with the loaf!  I think the exercises gave some good signposts in how to achieve the objectives of the assignment and Hunter el al (2011) is an outstanding accompanying text.  I am starting to feel quite confident in setting up the shots after initial experimentation and found that I am getting faster at reading the situation and getting my first approximation of where to place lights, diffusers, gobos and the camera fairly close.

On the technical front, I think the bigger lights are a great success and reduce the need for insanely slow shutter speeds as well as their being such a large light source when brought close to the loaf and giving such soft shadows.
There are more shots to be taken and final submissions to be selected, but I'm reasonably happy with how this is going at the moment, so that's it for now ....
That's it for now .....

Monday, 15 October 2012

Assignment 4 - Applying lighting techniques - initial thoughts

The fourth assignment requires that the lighting techniques that have been developed through the exercises are brought together and applied to a single easily moveable object to demonstrate a specific and well defined range of physical properties.  This is the difficult bit .. there are lots of potentially suitable objects, many of which fulfil the criteria set for this assignment.  My tutor suggested that a possible candidate could be a loaf of bread, and also that I should contact him with my ideas when they were formed (assuming they form of course …).  The idea is to take eight photographs based on the four themes of the assignment which were shape, form, texture and colour. 

Shape is associated with outline of the object and needs to define its edges, making them stand out against the background through appropriate contrast; there also needs to be minimal detail showing in the object.  The images I took of the Beethoven bust which I lit from above but with the light set to the rear of the object come to mind as a demonstration of this, although I won’t be selecting that as the final object for assignment as it lacks colour.  I also need to show Form or volume of an object and show I am able to light it to make it look as 3D as possible.  Texture is all about the quality of the surface detail and would require small, hard shadows that I have seen from un-diffused light sources lighting objects from the side.  Finally, I need to show Colour as strongly as possible, and I have learned so far that even, diffused, soft light should achieve this if coupled with the right exposure; in earlier exercises it was possible to get a rich colour by underexposure rather than trying to achieve this in post-production.
The OCA assignment brief in the course notes also points out that I could photograph the object in “any other interesting, unusual or attractive lighting”.  An artist whose work has appealed to me for some time is Catherine Balet who has produced images using lighting from modern technology such as laptop screens, mobile phones and computer game screens and I have been considering having an attempt at this anyway, so it could be useful for an assignment shot as long as it demonstrates colour or one of the other characteristics I need to show.

I need to produce two photographs of each aspect and currently plan to try and take one inside with artificial light and one outside with natural light for each feature.  However, as the year progresses, and the clocks will change very soon, the outdoor options will recede as weekdays are not be possible for me and weekends are difficult, especially if I keep going on OCA study days, as don’t plan to start carrying a loaf of bread, a pineapple or a coloured pot around with me to London or Brighton ….. !!